
Hi. Today I’m going to show you how you can quickly start up a TeamCity server and run your first CI process in it.
This article is part of a series showing how to get started with popular CI/CD tools. In this article I will show you how to install a CI/CD tool and how to prepare the process of building and testing a simple Maven-based project.
What is TeamCity?
TeamCity is a continuous integration and delivery (CI/CD) server created by JetBrains, a company known for its developer tools such as Resharper or IntelliJ IDEA. The first version of the server was made available already in 2006 and is available both as a commercial and a free version. In the second case, we can use the free version also in commercial projects but we have a few restrictions, such as the maximum number of builds or agents.
What is Docker Compose?
To find out what Docker Compose is, go to the article: How to install Jenkins using Docker Compose?
Tools required
Before starting work, prepare the required tools. You can find a description of these tools on the website: How to install Jenkins using Docker Compose?
Preparations for the launch
We will start working on the installation by creating a dedicated directory where we will store TeamCity data and configuration.
> mkdir teamcity
> cd teamcity
In the next step, we will create three directories where the server and agent will save their configuration and logs.
> mkdir datadir
> mkdir logs
> mkdir agent_conf
In the next step, we still need to change the permissions of the above directories. This is because the server and agent is running in a container as a user without root privileges.
> sudo chown -R 1000:1000 datadir
> sudo chown -R 1000:1000 logs
> sudo chown -R 1000:1000 agent_conf
Installing TeamCity
In the next step, we create a docker-compose.yml file with the following contents:
version: "2.1"
services:
  server:
    image: jetbrains/teamcity-server:latest
    ports:
      - "8111:8111"
    volumes:
      - datadir:/data/teamcity_server/datadir
      - logs:/opt/teamcity/logs
  agent:
    image: jetbrains/teamcity-agent:latest
    volumes:
      - agent_conf:/data/teamcity_agent/conf
    environment:
      - SERVER_URL=http://server:8111
This configuration defines what containers we want to run. In our case it will be a TeamCity server along with one agent (a separate module to run CI/CD jobs). The most important configuration parameters are:
- image – the docker image we want to use on our server
- ports – a list of ports that we make available outside the container. In our configuration, we share ports 8111 (www portal)
- container_name – the name of our container
- volumes – specifies volumes that are used by the container. In our configuration, we have directories shared with the system (subdirectories in the teamcity directory).
Starting TeamCity
Launching containers is accomplished with the command:
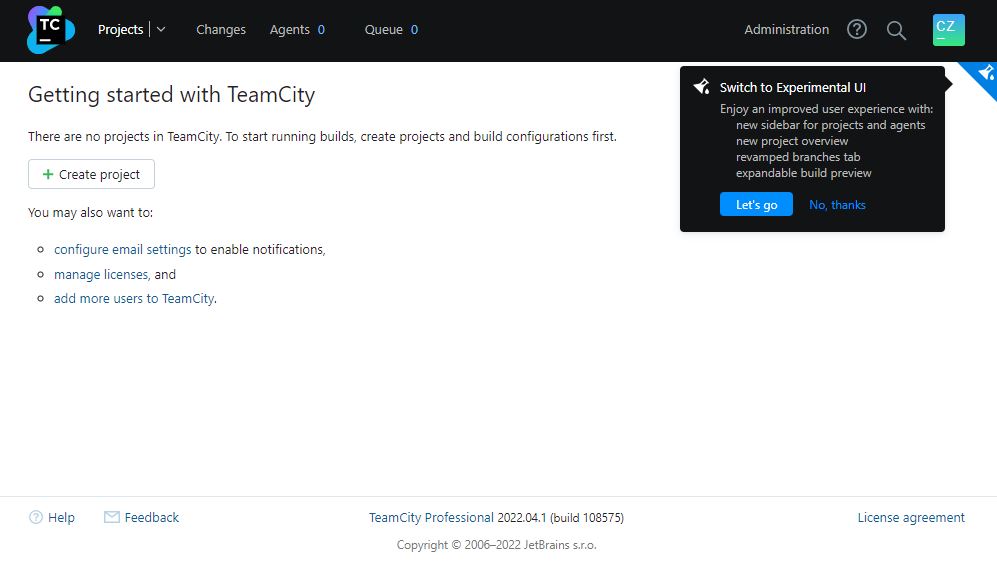
> docker-compose up -dOnce started, we go to our TeamCity server available at: http://localhost:8111. After going to this address you should see the following screen:
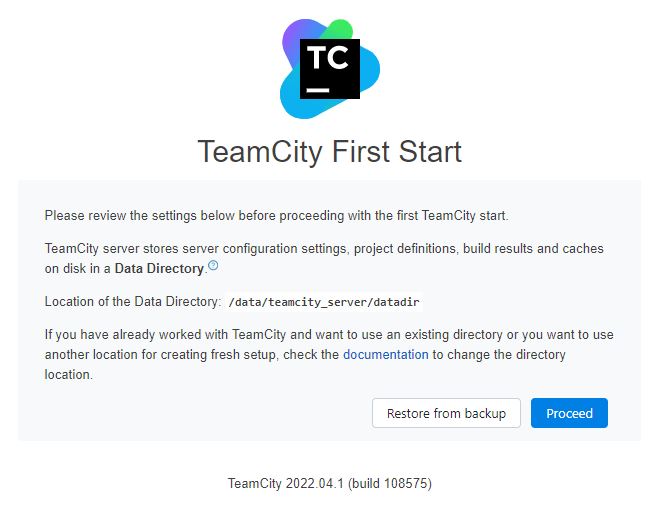
Warning: it may take a few minutes to launch the portal for the first time.
Here we select Proceed and go to the next screen.
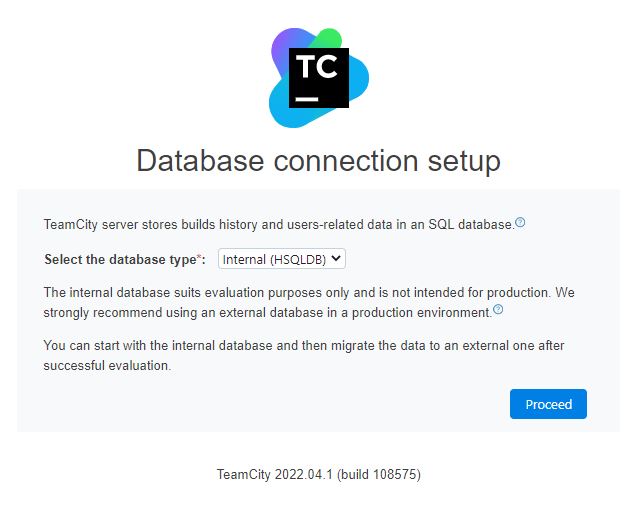
Here we select the default, internal HSQLDB database and proceed (Proceed).
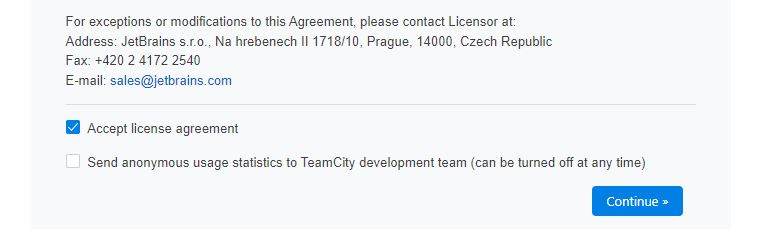
On the next screen, approve the license agreement and proceed (Continue).
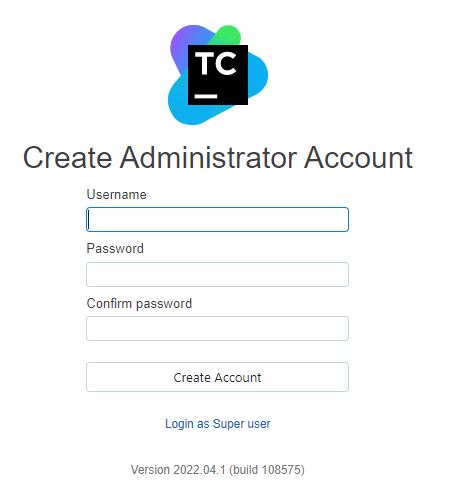
We have one more step left before launch: creating an administrator account. We enter the required details (username and password) and click on Create Account. Once the account is created, the following screen should appear:
Congratulations, the TeamCity server has been started correctly!
Agent Authorization
To work properly, the server needs build agents. These are separate applications that are responsible for actually running the build processes. TeamCity allows you to run agents on both Windows and Linux systems. In our case, we are using a Linux agent that will run within another Docker container.
While starting our system with docker-compose we started the server and one agent. This agent by default cannot connect to the server without additional authorization. To authorize the agent you need to go to the address:
http://localhost:8111/agents.html?tab=unauthorizedAgents .
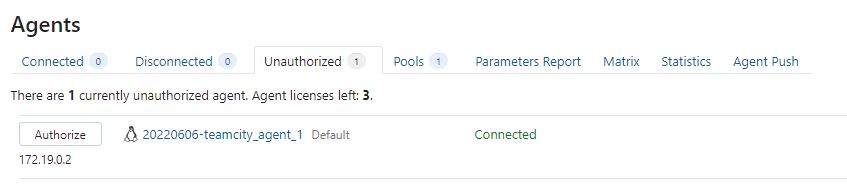
On the above page we should see one agent that is connected but requires authorization. Here we click Authorize and confirm the selection on the next page.
Now we are ready to launch our first project.
Creating the first project
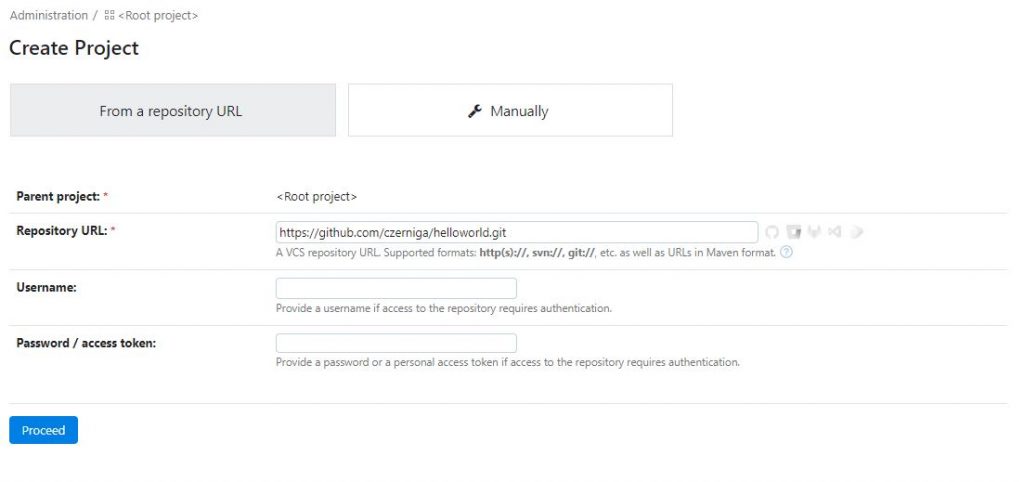
We now go to the projects page and create a new project:
On the new page, enter https://github.com/czerniga/helloworld.git in the Repository URL and confirm the selection by clicking Proceed.
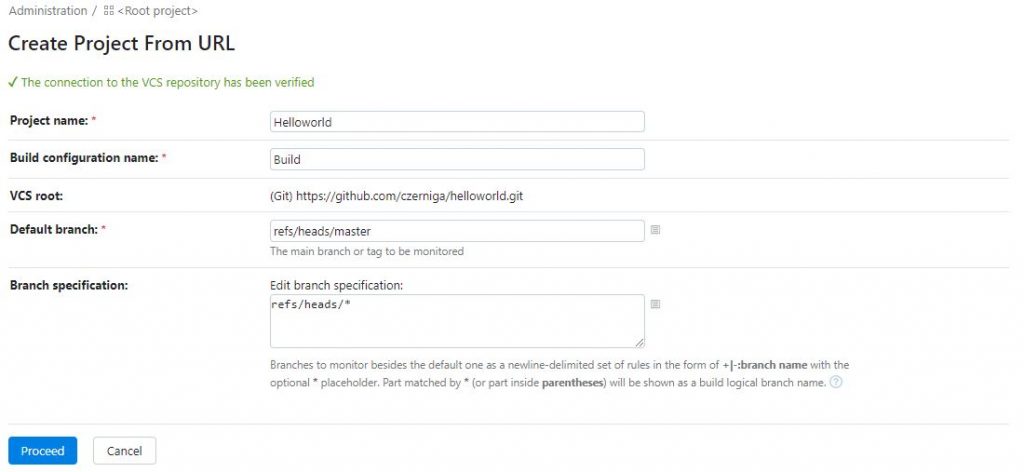
On the next page, confirm the default options and proceed (Proceed).
After importing the repository, the TeamCity server will offer the first step of our build process. We can validate the first step by clicking the Maven checkbox and then on Use selected.
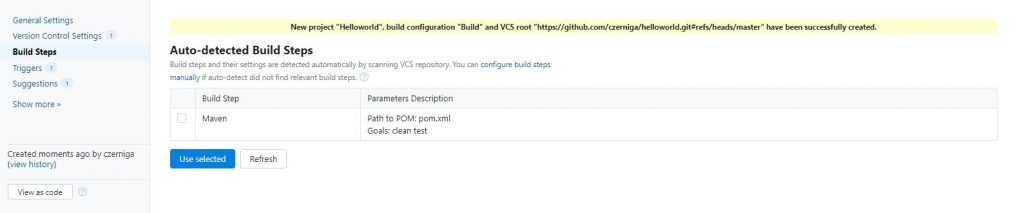
Once approved, we will see our build process with the first step called “Maven”. This step contains the command that builds the project: mvn clean test. However, our goal is to change this command. We do this by selecting Edit in the “Maven” step.
On the new page we will see the exact configuration of the first step. Here we need to change the Goals option to: “clean package“. As shown in the screenshot below.
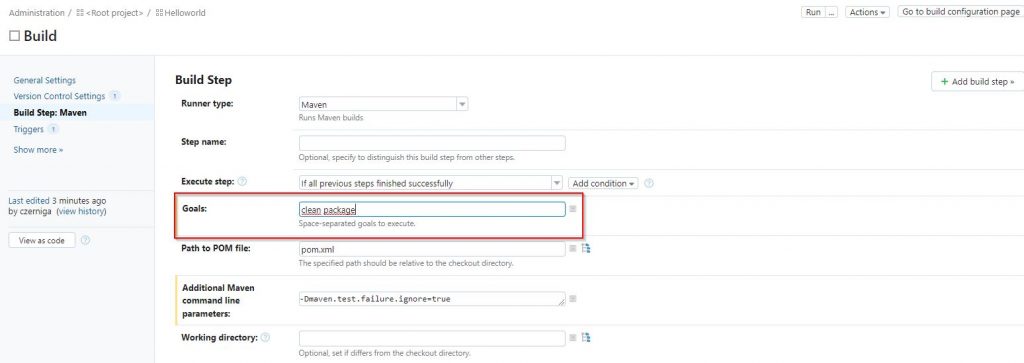
Confirm the change by clicking Save at the bottom of the page.
Now we will add a simple step that tests our project by running the jar file. We do this using the Add build step option.
In the second step, choose Runner type = Command Line. In Custom script, paste the following commands:
echo "Running tests"
java -cp target/helloworld-1.1.jar com.coveros.demo.helloworld.HelloWorld
As a result, the second step should have the following configuration:
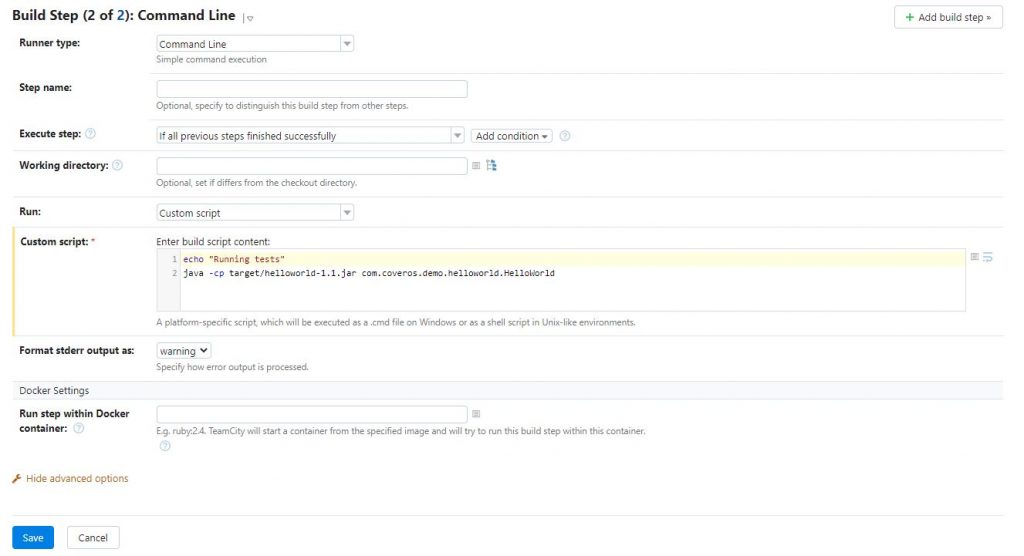
Save the step by clicking Save.
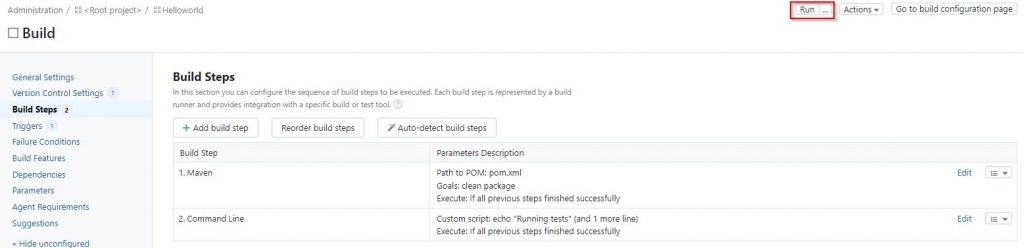
After configuring the steps of our process, we can proceed to run our project for the first time. We do this by clicking on the Run button.
After a few moments, the project should be successful.

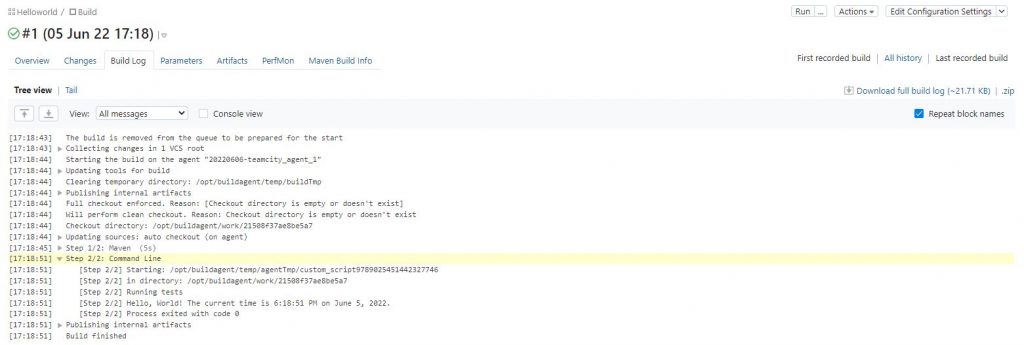
By clicking on the first build we can preview the entire log of the build and testing process (Build log tab).
We stop the container
The containers containing our service have been started with a switch causing them to run in the background. If you want to stop the portal you should execute the command:
docker-compose downSummary
In this tutorial I showed how you can run TeamCity server along with one agent running in docker container. The configuration given here will save all server data in a directory on your computer/server. Therefore, the data will not be deleted when you stop or delete the containers. This also makes migrating to a new environment very easy (by copying directories).
after start
teamcity$ docker-compose up -d
I received error:
service “server” refers to undefined volume datadir: invalid compose project
Did you create this datadir directory?
I have the same problem and I created that datadir directory
Add this at the end of docker-compose.yml file:
volumes:
datadir:
logs:
agent_conf: