
Hi. Today I will show you how you can run your first CI project in AWS CodeBuild.
This article is part of a series on how to get started with popular CI/CD tools. In this entry I will show you how to prepare the process of building and testing a simple Maven-based project.
What is AWS CodeBuild?
AWS CodeBuild is a continuous integration service that compiles source code, runs tests, and prepares packages ready for installation. Using CodeBuild, you do not have to prepare and manage your own build server. What is important, the solution is fully scalable and allows you to use other services available in AWS such as secret manager or advanced privilege management.
Preparations
Projects in AWS CodeBuild use code hosted in GIT repositories. In our tutorial, we will use code that will be hosted on GitHub. Therefore, let’s first make sure that we already have a GitHub account.
After creating a GitHub account, I also suggest creating a fork (copy) of the repository available at: https://github.com/czerniga/helloworld . In this repository, I have posted a simple Java project that will serve as the source code for our CI project.
We will be using the docker image for Maven when building the project. The image will be downloaded from the official DockerHub registry. Unfortunately, the portal has introduced a limitation on the number of registry image downloads. In practice, we will not be able to download the image from the CodeBuild service without first logging into this service. Therefore it is necessary to create an account in this portal (https://hub.docker.com/signup).
Creating a secret for DockerHub
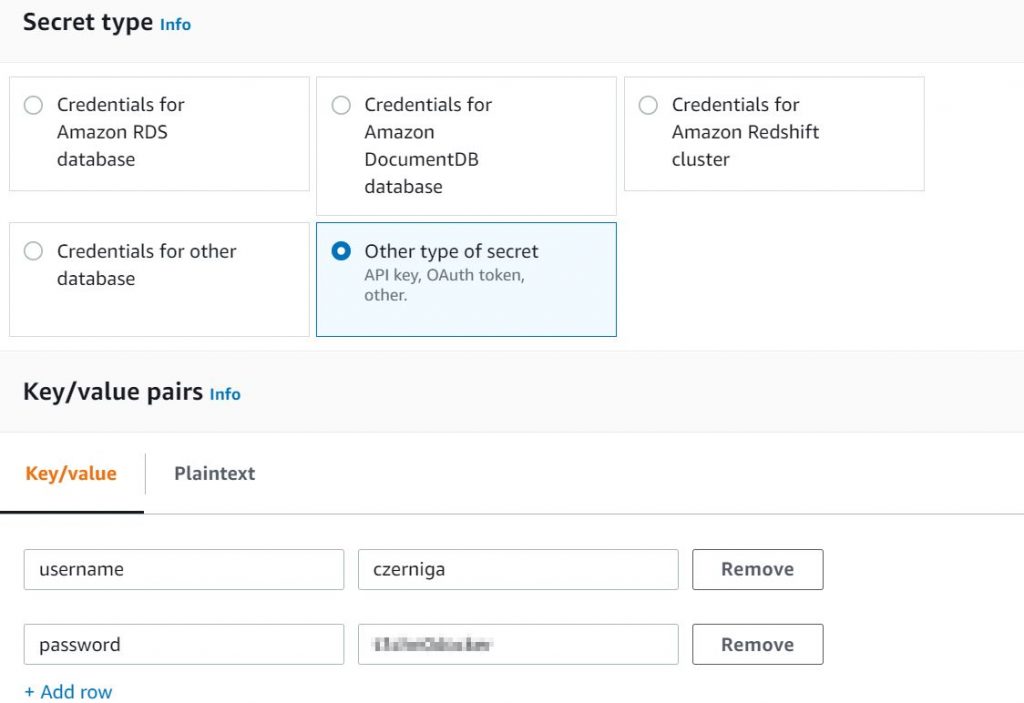
Before we get started properly, we will create a secret containing the login and password for DockerHub. To do so, go to the “AWS Secrets Manager” page in AWS. Click on Store a new secret. On the new page select Other type of secret. Below that enter two lines in the key/value field:
- username – the name of our user in DockerHub (remember this is not an email address)
- password – the password for our account
For the purpose of our tutorial, we leave the default KMS Key (DefaultEncryptionKey). Then we go to the next page (Next button).
On the next page we give our secret a name: DockerHub. Leave the other options unchanged and go to the next pages (2 x Next button) and then save the secret (Store button).
Pipeline creation in CodeBuild
After creating the secret, we can proceed to the actual creation of our pipeline. To do this, go to the CodeBuild page and press the Create build project button.
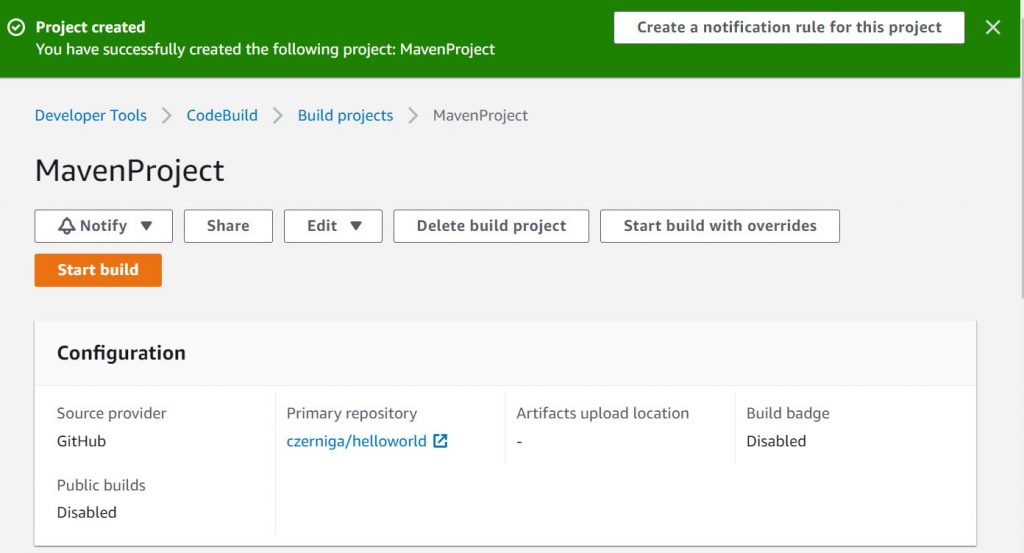
On the next page, we give the project a name: MavenProject. Then go to the Source section. There we select Source Provider Github and in Repository Connect using OAuth.
After that, we click Connect to GitHub. In the new window, we login to GitHub and approve AWS permissions to retrieve data from the account.
Once approved, we click Repository in my GitHub account and in the GitHub repository list, we select our cloned project.

In the next step go to the Environment panel. There, select Custom image and Environment type: Linux. Then choose Other registry and in External registry URL field type maven:latest.
In the Registry credential, type DockerHub. Leave Service Role and Role Name unchanged.

Now we go to the Buildspec panel, where we select Insert build commands and click Switch to editor.
Our pipeline definition will appear in a new field. Let’s paste our code there:
version: 0.2

phases:
  build:
    commands:
      - echo "Compiling the code..."
      - mvn clean package
      - echo "Compile complete."
  post_build:
    commands:
      - ls -al
      - echo "Running tests"
      - java -cp target/helloworld-1.1.jar com.coveros.demo.helloworld.HelloWorld
The above code defines for us the two phases of building and testing our application:
- build: here we build our project in Maven
- post_build: here we run our simple test
Now go to the bottom of the page and save the project: Create Build Project.
On the next page we can start our project. To do this we click Start Build.
After a few moments the project should build. You can view the current build status in the Phase details and Build logs tabs.

Summary
In this tutorial I showed you how to quickly create your first project in AWS CodeBuild. The project creation process itself should not take more than 15 minutes. Additionally, AWS provides 100 minutes of building for free per month as part of the AWS Free Tier. This allows us to see if this solution is right for us at no cost.
Be First to Comment