Hi. Today I will show you how to quickly start a Drone server for GitHub and add your first CI/CD pipeline.
This article is part of a series on how to get started with the popular CI/CD tools. In this article, I will show you how to install the CI/CD tool and how to prepare the pipeline with building and testing stages for simple project based on Maven.
What is a Drone?
Drone is a continuous software delivery system based on container technology. The drone uses simple YAML files to define the processes of continuous building, testing and automatic installation of projects. Importantly, all tasks are performed inside the containers.
What is Docker Compose?
To find out what Docker Compose is, go to the article: How to install Jenkins using Docker Compose?
Required Tools
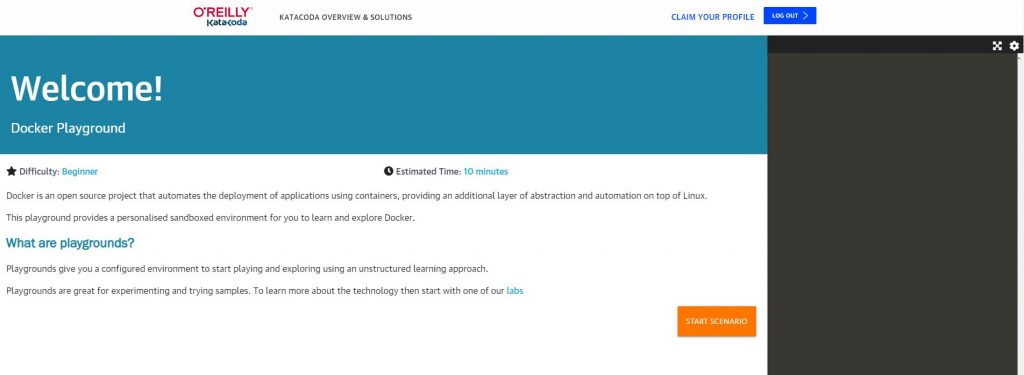
For this guide, we will use the environment (sandbox) provided by KataKoda: https://www.katacoda.com/courses/docker/playground. It is a website that allows you to run docker containers in a virtual environment in a browser. Therefore, it is not necessary to install the tools on our local environment.
It is worth remembering that the session in this environment lasts an hour. After this time, our work will be deleted. Nevertheless, it is worth using this website to check if the Drone is a tool worth paying attention to.
The only requirement for this guide is to have a GitHub account and to make a fork (copy) of the repository available at: https://github.com/czerniga/helloworld. This repository contains a sample Java project that will be used as a source for the CI / CD process.
Running environment
In the first step, go to https://www.katacoda.com/courses/docker/playground and click START SCENARIO.

After starting the environment, we will see a scenario on the left that allows you to quickly familiarize yourself with Docker. However, this will not be useful for us at this point. The panel on the right is more important to us, where we have a fully-fledged terminal, in which we have the docker and docker compose tools available. Importantly, containers launched in this environment are available from the Internet. It will be useful when we start the authorization mechanism.
Before starting work, we need to know the address of our environment. To do this, click on the link available in the left panel (View port at …). In the new screen, enter port 80 and click Display Port.

After switching to the new page, we copy the URL of our server. You will need it in the next steps.
Application configuration in GitHub
The Drone service does not contain a built-in authorization mechanism and relies fully on the Oauth mechanism provided by external websites where we store our application code. Currently, the Drone supports several such services (including GitLab, GitHub, Bitbukcet). In our guide, we will focus on GitHub.
To enable OAuth authorization on Github, you need to create an OAuth application. For this purpose, we log into our GitHub account and create an application, which is described in detail in this guide: https://docs.github.com/en/developers/apps/building-oauth-apps/creating-an-oauth-app
When creating the above application, enter the URL you copied in the previous step in the Homepage URL field. However, in the Authorization callback URL field, enter the URL with the “/authorize” endpoint added at the end of address. In my case it looked like this:

After creating the application, we still need to create a password for our client. To do this, click on Generate a new client secret. After a while, a new password will be created for us. In this step, we copy the Client ID (at the top) and Client secret (at the bottom).

We start the service in docker
Now we go back to KataKoda and create the file docker-compose.yml with the following content:
version: '2'

services:
  drone-server:
    image: drone/drone:0.8

    ports:
      - 80:8000
      - 9000
    volumes:
      - drone-server-data:/var/lib/drone/
    restart: always
    environment:
      - DRONE_OPEN=true
      - DRONE_HOST=${DRONE_HOST}
      - DRONE_GITHUB=true
      - DRONE_GITHUB_CLIENT=${DRONE_GITHUB_CLIENT}
      - DRONE_GITHUB_SECRET=${DRONE_GITHUB_SECRET}
      - DRONE_SECRET=${DRONE_SECRET}

  drone-agent:
    image: drone/agent:0.8

    command: agent
    restart: always
    depends_on:
      - drone-server
    volumes:
      - /var/run/docker.sock:/var/run/docker.sock
    environment:
      - DRONE_SERVER=drone-server:9000
      - DRONE_SECRET=${DRONE_SECRET}

volumes:
  drone-server-data:
This configuration defines our containers for the Drone server. In this case, it will be the Drone derver and one Drone Agent (a separate module for running CI / CD tasks). The most important configuration parameters are:
- image – the docker image that we want to use on our website
- ports – a list of ports that we make available outside the website. In our configuration, we provide ports 80 and 9000
- volumes – specifies the volumes that are used by the container. In our configuration, we have a volume that allows access to the Docker environment from the Drone server level.
To properly run this configuration, we need to define 4 environment variables:
- DRONE_HOST – Drone server address. This is the KataKoda url that we copied in the previous step
- DRONE_SECRET – is the password that will be used for communication between the Drone and Agents. You can generate them, for example, with the command “openssl rand -hex 16”
- DRONE_GITHUB_CLIENT – This is the client ID (CLIENT ID) of our GitHub app
- DRONE_GITHUB_SECRET – This is the password (Client secret) of our GitHub application.
Below are the instructions that set our environment variables with sample values:
export DRONE_HOST=https://2886795289-80-elsy06.environments.katacoda.com/
export DRONE_SECRET=216efb6e9dac2ae80ca69051d7c28d61
export DRONE_GITHUB_CLIENT=518e68a12cd76071d39b
export DRONE_GITHUB_SECRET=25e1a8e6211f3141645d52b59cd0512862dd7eba
After setting the above variables, we can start our website. We do it with the command:
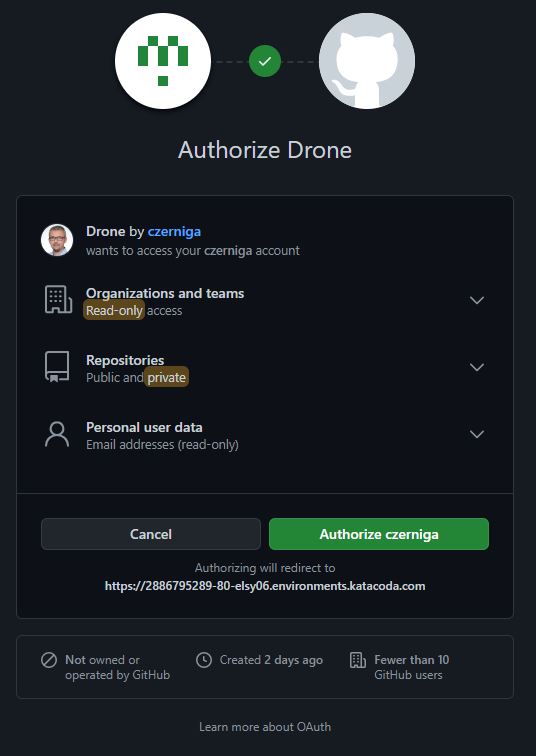
> docker-compose up -dAfter going to the address of our server, a message will appear regarding the authorization of the Drone server in our Github account. We authorize this access here.

After authorization, we should see a screen for downloading information about the repositories on our GitHub account. After a while, we should go to the main server screen.

On the above screen, select our imported project “czerniga/helloworld” and activate it on the server (set the switch on the right). After refreshing, we will see information about this project on the left. So far nothing has been launched for this project so we do not have any specific information here.
We create the CI/CD pipeline
To create a task in our project, we need to add an appropriate file with instructions. Here, much like in the case of GitLab, we create YAML files called .drone.yml in the root directory of our repository. We can do it via the GitHub UI or with our favorite Git tools.
In the created file, add the following content:
pipeline:
  build:
    image: maven:3-jdk-10
    commands:
      - echo "Compiling the code..."
      - mvn clean package
  test:
    image: maven:3-jdk-10
    commands:
      - echo "Running tests"
      - java -cp target/helloworld-1.1.jar com.coveros.demo.helloworld.HelloWorld
The above file defines how the CI/CD process is to work. The most important elements are:
- pipeline: the main element in our definition that it is a pipeline
- build: the first step in our definition to build our project.
- test: the second step, the purpose of which will be the test launch of our project
After saving the file in the repository, we can go to our server. After a while, the entire process will start automatically, which will consist of three steps:
- repository cloning
- building a project
- tests
After a while, the project should build up. After going into details, we can check the logs of each of the tasks.

Congratulations, you have just created your first CI/CD pipeline in Drone!
Container stop
The containers containing our service were launched with the switch causing the work in the background. If you want to stop the portal, execute this command:
docker-compose downSummary
In this tutorial, I showed you how to quickly start a Drone server with one agent. Importantly, this server is very light. After launching, the containers for the server and the agent take only about 20 MB of memory! Therefore, it is worth taking an interest in this solution, even though it does not contain as many configuration options as the competition (eg GitLab).

Be First to Comment