Hi. Today I will show you how you can run your first CI/CD project in CircleCI in 10 minutes.
This article is part of a series on how to get started with the popular CI/CD tools. I will show you in this article how to prepare the process of building and testing a simple project based on Maven.
What is CircleCI?
CircleCI is one of the most famous CI/CD platforms used by companies such as Spotify and BuzzFeed. The platform provides the launch of CI/CD processes within the cloud (SAAS) or your own infrastructure.
Preparations
CircleCI processes rely on code taken from GIT repositories on Github or Bitbucket. As part of this guide, we will use the code available on Github. Therefore, before starting work, make sure that you have an account on this site.
In addition, I also suggest making a fork (copy) of the repository available at: https://github.com/czerniga/helloworld. This repository contains a sample Java project that will be used as a source for the CI / CD process.
First login
After going to the login page (https://circleci.com/vcs-authorize/), select the option to log in using Log In with GitHub.

On the next screen, we provide our details for the GitHub account.

In the next step, we will be asked to provide some information about who we are and what we want to use CircleCI for.
On the next screen, you will be able to create a process based on the available repositories in our GitHub account. Here we choose our copied helloworld project and the option Write your own using our starter config.yml template

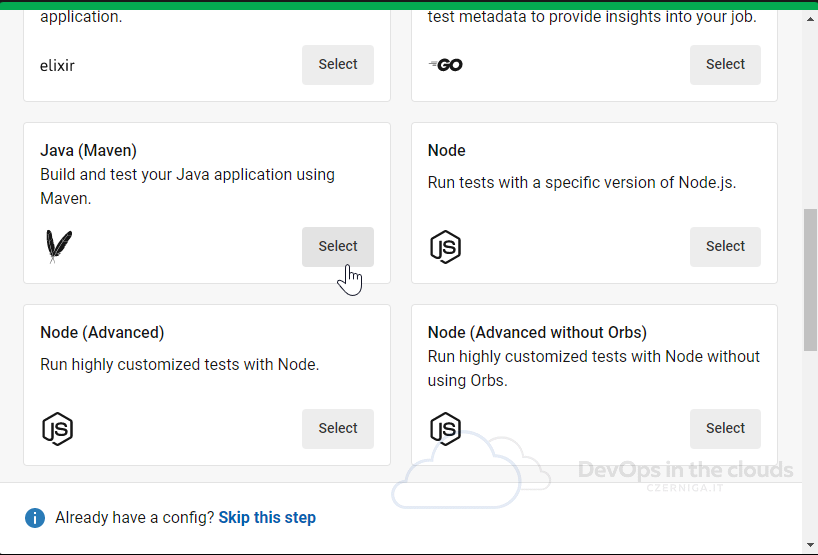
Now we can choose a predefined type of project. Here we select project Java (Maven):

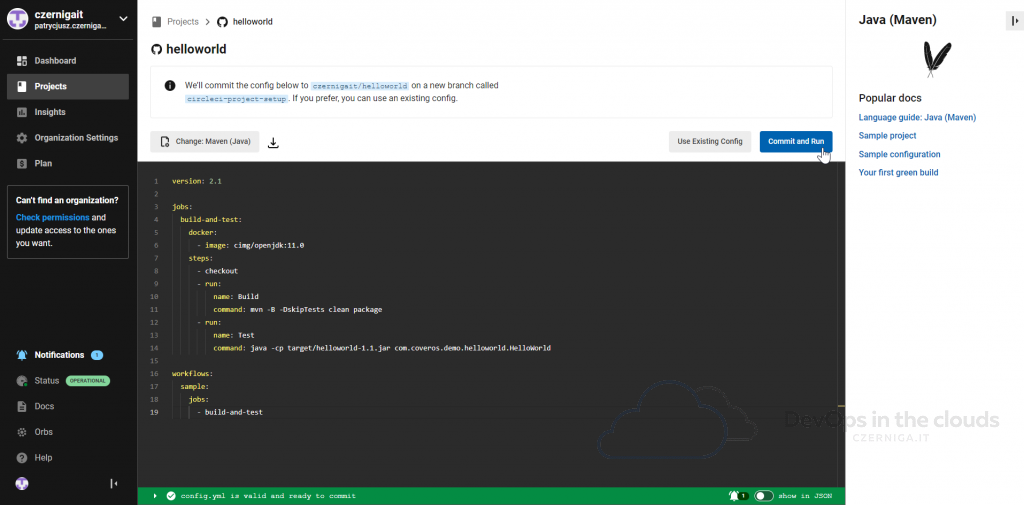
After going to the next screen, we see an example of building and testing code for the Maven project. The code is based on the Yaml syntax and is very similar to the GitLab CI/CD files syntax. In the window with the code, paste the following content:
version: 2.1

jobs:
  build-and-test:
    docker:
      - image: cimg/openjdk:11.0
    steps:
      - checkout
      - run:
          name: Build
          command: mvn -B -DskipTests clean package
      - run:
          name: Test
          command: java -cp target/helloworld-1.1.jar com.coveros.demo.helloworld.HelloWorld

workflows:
  sample:
    jobs:
      - build-and-test
The above code defines a process based on one build-and-test task (lines 17-19). This task consists of three steps:
- checkout – getting the code from the repository
- run – Build – building our project
- run – Test – test execution of our project
After pasting the code, we will immediately get information whether our code is correct (great feature!).

We approve the changes by clicking the Commit and Run button.

After approval, we will go to a new page where we will see that our task is already running. After a dozen or so seconds, we should see that the task has been properly built.

Congratulations, you have just created your first CI/CD job in CircleCI!
If you want to check how building and testing the application looked like, you can go to the log screen by clicking the text build and test.

On the next page, we can check each step of CI/CD process. On the screen below I showed the result of the tests for our application.

Importantly, the application build code is automatically saved to the repository. In my case, the code was added to the branch on named circleci-project-setup. The behavior of CircleCi can of course be changed in the configuration.

Summary
In this tutorial, I showed you how to quickly create a project in CircleCI. The process of creating an account and launching the project should not take more than 10 minutes. Thanks to the predefined templates, it is very easy to start working with different types of projects.

Great article. I’d love to read more about CircleCI.